Last week - thanks to Ashley and Kato Sensei - I was able to partake in the Japanese art of shippo-yaki. Shippo-yaki, or cloisonne, is an ancient technique for decorating metalwork objects. I don't believe that the craft originated in Japan; however, it has become widely popular here.
Ashley (who is also from Kentucky and whose husband works for Toyota) began taking lessons with sensei after she saw some beautiful shippo pieces at a friend's house. She asked about the pieces - and to make a long story short - began working with sensei. Sensei has been making shippo-yaki for more than 45 years...and works out of a studio at his home. He showed us some of his pieces - which were absolutely stunning! Sensei has been learning English by reading his dictionary and asked Ashley if she would help him coordinate small group classes once per month...so that he could practice his English and also share his love of shippo-yaki with others.
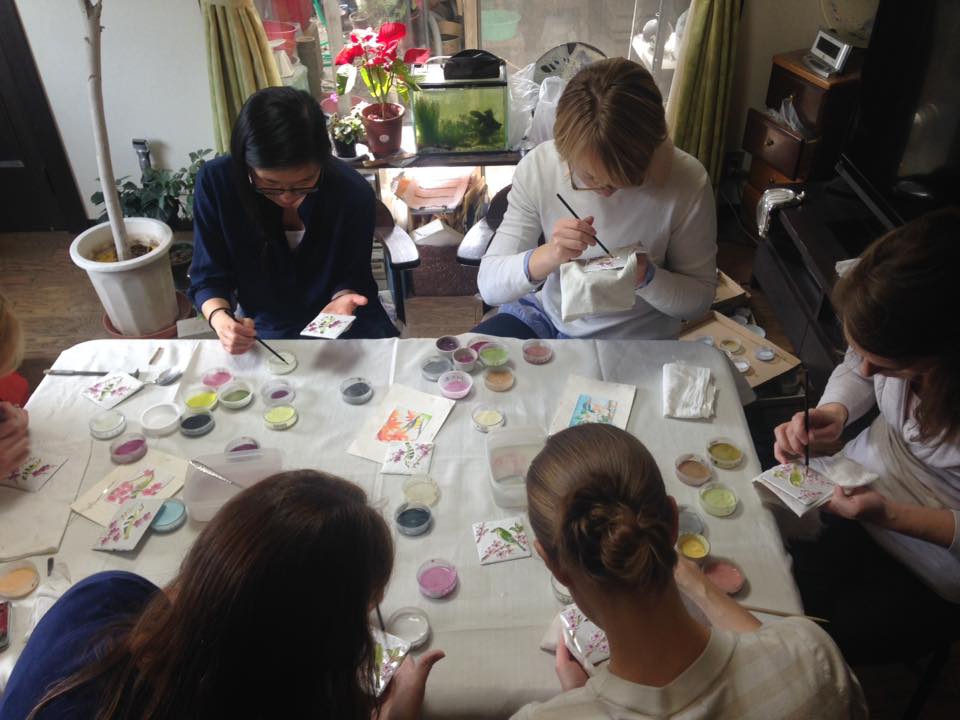
Sensei and his wife graciously welcomed seven of us into their home for almost an entire Friday (we started about 10am and finished up about 3:30pm). While they spoke little English and most of us spoke little Japanese...the dialogue flowed well with lots of pointing and demonstrating! For this particular class - we got to pick which season (winter, spring, summer, fall) we wanted to do. Since spring/cherry blossom (sakura) season is so huge in Japan...I chose the sakura tile. Here are the steps (and some pictures - of the shippo piece I made) involved.
1. The base for shippo-yaki is a piece of copper. The copper is treated, dipped into a liquid glass mixture, and then fired. That gives you the white tile you see below - which becomes the canvas (so to say) on which you create your design.
2. Next, you draw your design in permanent marker onto the tile. The marker burns off when fired - so you won't actually see it. Sensei created these images - so this part was done for us. Phew...because my drawing repertoire is usually reserved for stick figures only.
 3. Once the image is drawn, gold/silver wire is molded and attached (with glue) to match the pattern...creating the image you see below. We were able to mold/attach our initials and it was super difficult - I can't even imagine attempting to mold an image like this out of ribbon! This is then fired in the kiln for a few more minutes to help the glue set.
 4. Now you are ready to "paint." The mixtures have a paint-like appearance, but they are actually finally ground glass...which looks a lot like sand mixed with water. You use a paintbrush to fill in the "compartments" with the paint. You can add water to help make the paint easier to spread. Sensei had a model for us to follow - so that we could make our colors match his. I am learning that when doing Japanese crafts - they really, really like your product to match the model as closely as possible. They often help you to "fix" your product,
  |
| You can see the "sand-like" consistency. |

 5. Now it's off to the kiln for the first round of firing. This melts the "paint" and shrinks it down. You can see the shiny look that the glass has once it begins to melt.
6. Then you repeat the painting and firing process again - making sure to fill the "compartments" up to the top. I decided to make my background blue and white to resemble clouds and to make the colors pop just a bit more. Plus I figured that it would match the theme of my blog.
7. Then it's time for the finishing touches - the tile gets polished, coated with one more layer of glass and then fired for the last time.
Here is the finished product! I would say it turned out pretty well! I am excited to display it - and secretly hoping that I will get to do shippo-yaki with sensei at least one more time while I'm in Japan. He's going to retire pretty soon...and I'd love the chance to learn even more from him (and also make the "fall" tile).


that's gorgeous! how cool!
ReplyDeleteSoo cool!! I miss you !!! Call me!!
ReplyDeleteSo gorgeous! And it sounds like so much fun!
ReplyDelete